Pickled Okra

I took my last jar of pickled okra to a retirement party a few weeks ago so I needed to make some more.   I recruited the help of a dear friend, Marjorie, since I knew she loved pickled okra probably more than I did, plus it would give us a chance to catch up and spend some time together that we don’t get to do very often given our hectic schedules.  She of course accepted my offer and we had a blast!  

Since I don’t have a garden this year, I went to the Raleigh Farmer’s Market to get the produce.  I had figured on getting about 15 pounds of okra in order to make about 4 batches (half of the work in canning is getting everything out and going so why not double-up and make everything more efficient?)  Once I got to the market and saw that the nice, small okra pods were going from around $2.49 to $2.99 a pound, I was in shock.  These were going to be expensive pickled okra!  I finally stopped at a booth that had the lowest price per pound and simply just asked them what they would sell 15 pounds of okra for.   The lady walked away from the booth to speak to an older man back at their truck and she came back and said I could buy a box for $20 which was equivalent to about 15 pounds.  So, my price per pound was $1.33 a pound!  From growing okra many times,  I know that there are no pests that really attack the plants, so I was pretty confident that these were at least pesticide-free.   And given their willingness to work with me on the price, I went ahead and bought my chili peppers and some other produce while I was there.  

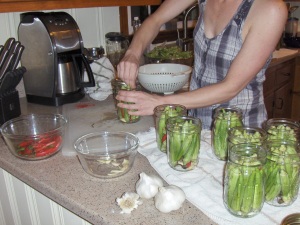
Making pickles with a friend is definitely the way to go.   Marjorie and I took turns on the various chores.  She tackled the sink-full of okra first and cutting just a snip off the tip so the okra would absorb all the juices while I snipped the ends off of the peppers, smashed garlic cloves, and prepared the canner, jars, and pickling liquid.   We talked, listened to some music, drank some wine, and made 23 pints of pickled okra.  I’m thinking of recruiting Marjorie’s help for making mustard here soon. 

Hot Pickled Okra (I quadrupled this recipe)

3 cups of water

3 cups of white vinegar

1/3 cup of pickling salt

2 tsp dill seed

3 1/2 lbs of small okra pods, washed and tips snipped off.

12 cloves of garlic (smashed with a knife blade)

12 Thai or small chili peppers washed and tips snipped off.

Prepare canner, jars and lids.

Combine water, vinegar, salt and dill seeds in a large stainless steel pot and bring to a boil, stirring to dissolve salt.  Reduce heat and keep warm until ready to ladle into packed jars.

Place 3 garlic cloves and 3 chili peppers into each jar and then pack with clean, trimmed okra pods.  Ladle hot pickling liquid into jars and seal jars.  Place jars into canner and process for 15 minutes.

Patience found in a bucket of wine. . .

I’m posting at a very late stage in home wine-making, so for those of you that are new to this hobby, there may be some terminology that’s new to you.  I plan on posting my progress as I start a new batch here soon; I have a gewurtzaminer kit ready to go and I’ll be making a watermelon wine from fresh fruit soon.   I needed to clear up some space in my kitchen as I’ve had 10 gallons of wine in either a bucket or a carboy since April.  I only have the space to do about 10-15 gallons at a time.  Wine can also take several months from fermentation to bottling.  The batches I’m posting about now I started the weekend after the tax deadline–not because I’m a such a good vintner that I keep notebooks (I don’t!!), but because I remember doing my taxes made me want to go and make a bunch of wine!    

About a month ago, I added clarifying and stabilizing agents to 10 gallons of wine.  5 gallons of a Chilean Carmenere and 5 gallons of a Yakima Valley, WA Viognier.   So, today I racked them both again (not necessary, but I don’t filter my wine and this final racking really helps improve the clarity–very important for a white wine).  And, of course, I had to sample the wines!   I have to say I’m quite pleased!  Especially, considering my flagrant disregard for following the instructions that came with the juice kits.  If I had followed the instructions in the juice kits, my wine would have already been bottled, but I learned, quite by accident, that patience in wine-making has great dividends.  

I had started a Merlot last year, and got so busy that I couldn’t rack the wine after the first week of primary fermentation, as the directions stated.    After 3 weeks or so, I figured it was ruined, so I was then in no hurry to throw it out.  So, finally after another 3 weeks had passed,  I decided to see what to do about the ‘ruined’ wine.   About 5 weeks after the directions instructed me to rack the wine, I sniffed the wine and I didn’t smell any off odors, so I took my thief and tasted it.  I was shocked!  This was probably my fourth or fifth batch of red wine and the flavor was more well-rounded and had more body than my previous wines.   So, I racked the wine into a clean, sanitized carboy, added bentonite and metabilsulfite and let it sit for another week, and then I bottled it.    

I only have 1 bottle of this wine left–so much for letting it age!    Given that experience, I prefer to ‘age’ my wines in the carboy with the oak chips.  I check the airlocks occasionally and I keep them covered with towels to keep light out and the temperature more constant.  These latest batches of wine I started 4 and 1/2 months ago.  If I had more room and enough equipment, I think I’d wait even longer before bottling.    The Viognier I’m especially anxious to start drinking.  It’s a semi-dry, with notes of apple and mango and has a very buttery mouth feel.  This has become my favorite white wine.   The Carmenere is a fruity medium-bodied red and I’ve found is a good red for summer.   5 gallons of wine makes about 24 bottles. 

A retirement party and a long-awaited, bargain pot . . .

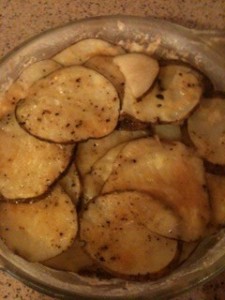
So a dear co-worker, Missus Wiggins, is retiring on Friday.  And, we’re all throwing her a party at lunch.  I signed up to bring condiments, pickles and a potato dish.  Of course, I’m bringing pickles that I’ve made, and I decided to take Scalloped Potatoes;  this gave me an excuse to buy a mandoline slicer that I’ve been wanting.   Oh, how easy it is to slice vegetables in uniform slices with a mandoline, and it’s super easy to clean.  You can also do Julienne slices, it says, with a secondary blade attachment.  I remember making carrot, parsnip, and beet oven fries last fall and can’t wait to try making them again with the new mandoline slicer and attachment.  More on that later. 


Scalloped Potatoes

5 medium-sized potatoes, sliced thinly, skins on.

3  cups of milk ( buttermilk, or goat’s milk)

1 medium white onion, sliced thinly

2 tbsp chopped, fresh rosemary

5-6 minced cloves of garlic

salt and pepper

Warm milk, garlic, and rosemary in a saucepan, but do not bring to boil.

1 1/2 cups of shredded jarlsberg cheese

1/2 cup grated parmesan

Layer potatoes and onions in greased baking dish,  sprinkle with salt and pepper, 1/3 of cheese, and pour 1/3 milk mixture over potatoes.  Continue layering,  saving some cheese for top layer.  Bake at 400 degrees for about 50 minutes. 

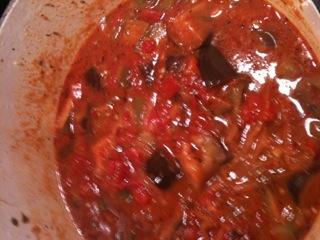
While I was shopping for my mandoline slicer, I found an enameled,  cast-iron, 5 qt. dutch oven marked down 60% to $40.   Oh, what luck!!  So I had to try it out and I decided to make a Ratatouille.  A Ratatouille is a great way to use up summer vegetables; it’s basically a French, vegetable stew that typically uses onions, garlic, bell pepper, zucchini, eggplant, and tomatoes.   There are infinite variations depending on what you have on hand. 

Ratatouille Sans Courge (minus squash)

Olive Oil

1 medium onion, thinly sliced

5 cloves minced garlic

1 tbsp of thyme

3 bay leaves

salt and pepper

3 tbsp red wine vinegar

2 tbsp chopped, fresh rosemary

2 large bell-peppers cut into bite-sized chunks

1 large eggplant cut into bite-sized chunks

1 quart crushed tomatoes

1/2 quart spaghetti sauce (just because I had it on hand and I needed to use it up.  Use tomato paste or pureed red peppers or rooster chili garlic sauce or harissa or something similar depending on what’s on hand and what seems good to you). 

Slightly cover bottom of 5 qt dutch oven with olive oil.  Heat until water drop spatters when it hits the oil.  Add sliced onions and saute until translucent.  Add garlic,  bay leaves, rosemary, thyme, and red vinegar  and stir briefly for a few minutes, then add cubed eggplant and peppers, salt and pepper to taste and toss well.

Once eggplant and peppers are coated with oil and herb mixture and slightly browned, add tomatoes and spaghetti sauce, cover and place in oven at 400 degrees for about an hour and half.   To serve, I typically prepare a baked, savory brown rice dish and spoon the Ratatouille over the rice.  I’ll share my favorite brown-rice recipe soon.  It produces al dente, yet perfectly separated grains of brown rice.   

And, while I was at it, I realized I needed some quick breakfast foods, so I went ahead and made 4 batches (2 variations) of Morning Glory Muffins.  A hearty muffin with a hard-boiled egg makes a nutritious, healthy breakfast that’s portable and easily eaten while on the go.  The muffins also freeze well, which is why I went ahead and made so many.   The variations here are on the use of eggs;  I use eggs occasionally, but I also like to use ground flax-seed when baking.  It’s a great way to reduce fat and cholesterol and at the same time incorporate omega-3 fatty acids in your diet without having to take a supplement like fish oils.  The walnuts also have a good bit of omega-3’s. 

Use 2 tbsp ground flax seeds in 6 tbsp of water for 2 eggs in recipes.   Add ground flax-seed to water in small saucepan and bring to a boil.  Cook for a few minutes, stirring constantly.  Add mixture to wet ingredients before incorporating into dry mixture. 

Whole-Wheat, Flax Seed-Variation Morning Glory Muffins

Makes about 18 muffins. 

3 cups whole wheat flour

1 cup sugar

2 tsp cinnamon

2 tsp baking soda

1 tsp salt

2/3 cup applesauce

1/3 cup canola oil 

4 eggs or variation:  Use 2 tbsp ground flaxseed mixed with 6 Tbsp water, cooked until brought to boil, stirring constantly for 2 eggs. 

1 1/4 cups chopped, peeled apples (or you could use canned, spiced peaches). 

1 1/4 cups grated carrot

3/4 cup chopped walnuts

3/4 cup dried cranberries. 

Sift dry ingredients, except sugar.  Add sugar and mix well.  Mix wet ingredients.  Stir wet ingredients into dry mix and mix well.  Add apples, carrots, cranberries, and nuts and mix well.  Spoon into silicone muffin pans or greased metal muffin pans and bake at 350 degrees for 20-25 minutes.

Community-Supported Agriculture

This is the first year in many I haven’t had a vegetable garden.  I have a few veggies growing in pots on my deck, but I’ve found that to be more time-consuming and challenging than a garden given all the watering I’ve had to do in this very hot, dry summer here in North Carolina.    So, I’ve been relying on what I can get at the farmer’s market or grocery store and it hasn’t been ideal, to say the least.  I’ve been aware of community-supported agriculture or CSA’s as they’re called, but I’ve always thought I’d get way too much produce than I could eat in a given week.  However, I have decided to try a CSA for next year rather than trying to grow my food for a couple of reasons. 

My friend Marjorie’s husband’s family has an organic CSA right down the road from me.  I’ve visited Marjorie just recently  and I fell in love with the place and what her family is trying to accomplish.   This is farm-land that has been in her husband’s family for generations and it’s nice to see it being maintained as a farm and not being turned into subdivisions as is typical for the area in which I live.   If you’re local to the Raleigh area, check out Hilltop Farms for more information.  

And, there’s a blog I’ve been following for a bit, that features vegan food prepared from her weekly CSA and I like how what is in season and local is what inspires her recipes.   http://veganhomemade.wordpress.com/        Also, there’s a recently discovered blog, which just featured 10 reasons why one should join a CSA today:  http://agrigirl.wordpress.com/2010/07/22/t3-report-reasons-to-join-a-csa-community-supported-agriculture/

So, as much as I love gardening, I’m slowly realizing I can’t do it all and do it well.  I’m learning to prioritize.   I’ll save the vegetable gardening for retirement, particularly now that there are organic, local, small-farm alternatives widely available.   Well, maybe I’ll just have a herb garden–they are mostly perennials after all.

Quinoa Veggie ‘Burgers’

As busy as we all are, it’s difficult to always prepare your own food.  I’m certainly not there yet.   And as a vegetarian, it can be even more difficult to eat healthy while on the go.   Making your own veggie burgers (and freezing them with a vacuum food sealer) are a great way to have fast food that is healthy and homemade.    But rather than using highly processed vegetarian proteins like Morningstar, Yves, etc,  or beans, which I sometimes tire of, I used cooked quinoa in this recipe.   Quinoa is an amazing food–it’s not really a grain, but rather it is a seed in the goosefoot family of plants, like beets, spinach, and swiss chard.   It has a very high protein content,  and contains all essential amino acids (important for a vegetarian).  It is low in fat and very high in phosphorous, magnesium and iron.   Here you can look up the  Nutritional Data of many foods.

Quionoa is as easy to prepare as rice and behaves much like couscous in recipes.  This recipe makes about 30 burgers depending on how thick you make them, but I freeze them for quick and easy meals or snacks.  Lately, I’ve been eating on these for breakfast for my morning commute–just the plain burgers, nothing else.  They’re filling and they keep me going given the nutritional density of the burgers. 

2 cups of quinoa

4 cups of water

1/2 cup finely chopped onion

5-6 minced garlic cloves

1 1/2 cups grated carrot

1 1/2 cups grated summer squash

1 box frozen spinach, thawed and excess water squeezed out.

Lemon zest

1/3 cup of whole wheat all-purpose flour

2 tsp of baking powder

2 eggs

salt and pepper to taste

Bring water to a boil and add quinoa.  Reduce heat to a simmer and cook for about 20 minutes or until water is absorbed.  Let cool.

Combine quiona with onion, carrot, squash, spinach, lemon zest, flour, baking powder, egg, salt and pepper. 

Preheat oven to 400 degrees.  Spray a baking sheet with cooking spray and shape mixture into patties and place on baking sheet.  Use a spatula to flatten a bit.  Bake 10-15 minutes until lightly browned, then flip and bake another 10-15 minutes until the other side is lightly browned.

Oktoberfest Beer Mustard

October may seem a long ways off, or it may seem right around the corner; either way, there’s nothing better than a good Oktoberfest feast:  To start, prepare some good beer mustard that will have aged long enough by the time Oktoberfest celebrations start kicking off. 

Oktoberfest Beer Mustard

1 1/2 cups dark, malty beer.  Aviator ESB best.

1 cup brown mustard seeds

1 cup water.

1/2 cup malt vinegar.

1/2 cup lightly packed brown sugar

1/4 cup powdered mustard

1 tbsp onion powder.

In medium saucepan, combine beer and brown mustard seeds.  Bring to a boil.  Remove from heat, cover and let stand at room temperature until seeds have absorbed most of the moisture, about 2 hours.  

Prepare canner,  jars and lids. 

Puree mustard mixture until seeds are well chopped.  Pour mixture to saucepan and whisk in water and other  ingredients.  Bring to a boil, and boil gently, stirring often, until reduced and thickened.

Ladle into hot jars, leaving ¼ inch head space.  Seal and boil in boiling water bath for 10 minutes for ½ pint jars.  Makes 5 ½ pints of mustard.

Strawberry Wine and Tea

1/3 strawberry wine*

2/3 brewed Luzianne Tea*

Combine and serve chilled in large-bowled red wine glass.

Whole Wheat Cornmeal Squash Muffins

I like to make these and freeze them when I have an overabundance of squash.   They’re a nice alternative for corn bread and it’s so easy to pull a few out of the freezer and warm them up with a pot of chili or soup during the fall and winter months.   It’s also a great way to incorporate whole grains into your diet and they’re low-fat since the squash eliminates the need for oil and yogurt in place of milk. 

Squash-Corn Muffins

1 cup of stone-ground corn meal

1 cup whole wheat all-purpose flour

1 Tbsp of baking powder

¼ tsp of salt

¼ cup of Sugar

1 cup shredded summer squash

1 egg

1 cup yogurt

Sift dry ingredients and then whisk egg and yogurt together.  Combine wet with dry ingredients, then stir in shredded summer squash.  Spoon into greased muffin tins and bake at 375 degrees for about 15 minutes or until tester comes out clean.  Cool on rack for 10 minutes.

Honey-Spiced Peaches


Honey-Spiced Peaches

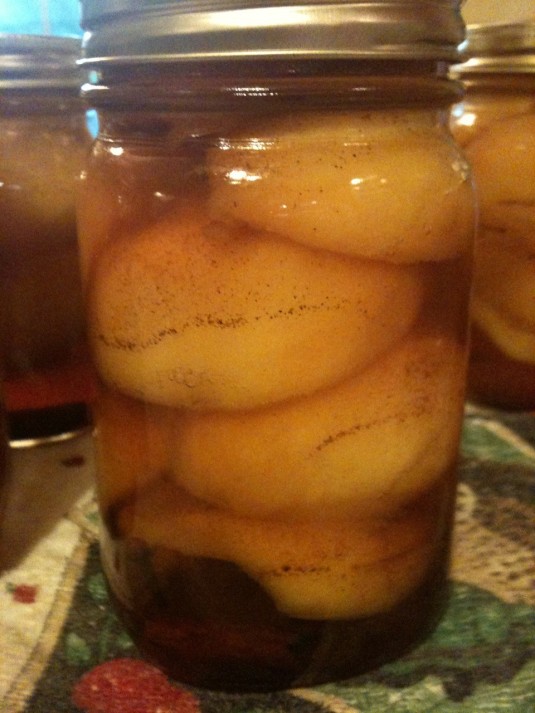
This is a perfect way to preserve peaches when they are in season.   I chop up about a cup of them and add them to muffin recipes throughout the year and they’re fantastic in oatmeal on winter mornings when you’re sick of apples.  

1 cup granulated sugar

4 cups water

2 cups honey

8 lbs small peaches, peeled, halved, pitted and treated* to prevent browning

6 cinnamon sticks

1 ½ tsp whole allspice

¾ tsp whole cloves.

Variation: Substitute 1 whole star anise per jar for the cinnamon sticks, allspice, and cloves. 

Prepare canner, jars and lids.

In a large stainless steel saucepan, combine sugar, water, honey.  Bring to a boil stirring until sugar dissolves.  Reduce heat to low, add peaches in small batches and warm about 3 minutes per batch.

Using a slotted spoon, pack hot peaches, cavity-side down into hot jars leaving ½ inch head space.  Add 1 cinnamon stick, ½ tsp allspice, and 1/8 tsp cloves to each jar.  Ladle hot syrup into jar to cover peaches.  Seal.  Place jars in canner, ensuring they are completely covered with boiling water.  Bring to a boil and boil for 25 minutes.

Home-Canned Tomatoes

Tomatoes

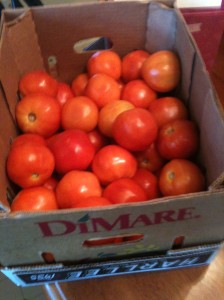
After making salsa, I still had a half box of tomatoes left over.


With tomatoes coming in full-force, I always like to can some for use in the winter in soups, stews, and sauces.   They’re easy to make and taste far better than store-bought canned tomatoes.   A half box of tomatoes made 12 quarts of crushed.  

To begin, it’s best to work in batches.   Bring water in a large stock pot to boil and begin scoring on the blossom end enough tomatoes to float in the stock pot of water.   Partially fill a sink with cold water for submerging the tomatoes once ‘peeled’.   Once the water comes to a boil, submerge your scored tomatoes into the water and let boil for a few minutes.  The skins will start to wrinkle and separate.  Remove with a slotted spoon and immediately submerge in the ready, cold water.  Once cooled, remove the skins and core and quarter or cut the tomatoes into wedges.  Then, cook the tomatoes in a large pot using a potato masher to crush them.  You can add seasonings here if you like.  Prepare jars and lids and bring water to boil in a large pot that will allow you submerge the jars in the boiling water.  Add 2 Tbsp of bottled lemon juice per quart jar or 1 Tbsp per pint jar.  Fill jars with crushed tomatoes leaving  1/2 inch of head space.  Seal with lids and place in canner and boil for 45 minutes for quart jars or 35 minutes for pint jars. 

The juice sometimes separates from the pulp when home-canning tomatoes.  This is perfectly safe.  However, to prevent separation,  try to cook the tomatoes as soon as possible after scoring.  Once a tomato is cut, enzymes are activated that cause this separation.